The Interior Design Process Explained: A UK Homeowner’s Step-by-Step Guide
Below are the core stages of the interior design process, explained in depth, including what you need to decide, what your designer produces, and what common terminology means.
Stage 1: Discovery & Initial Consultation
Goal: Understand your needs, clarify scope, and set the rules of the project.
This stage is the foundation. A good consultation doesn’t start with “What style do you like?” — it starts with how you live, what frustrates you in your current space, and what the project needs to achieve.
What you’ll cover
-
Your priorities: function, storage, layout, finishes, comfort, resale value
-
Who lives there (and how): kids, pets, home working, guests
-
Pain points: dark rooms, awkward flow, not enough storage, clutter magnets
-
Practical constraints: budget, timeline, structural limitations
-
Level of support needed: hourly consultation, fixed-price room package, or full renovation design
What your designer may ask for
-
Existing floor plan (or they can measure)
-
Photos/videos of the space
-
Pinterest links (helpful but not essential)
-
A rough budget range (even a “comfortable vs maximum” is fine)
Key terms you might hear
-
Brief: your written project goals and requirements
-
Scope: what’s included (and what isn’t)
-
Deliverables: what you’ll receive (plans, mood boards, drawings, shopping list)
✅ Homeowner checklist (before this stage):
-
What rooms are included?
-
What’s staying and what must go?
-
Your non-negotiables (e.g., more storage, sofa must stay, durable fabrics)
Image suggestion: a “before” photo collage of the room(s) + a simple “project goals” graphic.
Stage 2: Site Measure & Existing Layout Review (if needed)
Goal: Create an accurate base plan so everything fits and trades can work confidently.
If you don’t have accurate drawings, this stage is crucial. UK homes often have quirks—chimney breasts, uneven walls, odd alcoves—which can throw plans off if measured casually.
What happens here
-
Measurements of walls, windows, doors, radiators
-
Ceiling heights, bulkheads, beams
-
Notes on natural light direction and problem areas
-
Photos for reference
What you get
-
Existing floor plan (scaled)
-
Sometimes: reflected ceiling plan base (where lights would go later)
Why it matters
Accurate measurements prevent:
-
furniture that doesn’t fit
-
kitchen/bathroom layout errors
-
wasted spend on returns, rework, and delays
Stage 3: Concept Design & Mood Boards
Goal: Turn vague ideas into a cohesive design direction you can approve.
This is where your home’s “story” gets defined — not as a theme, but as a set of decisions that make everything feel consistent.
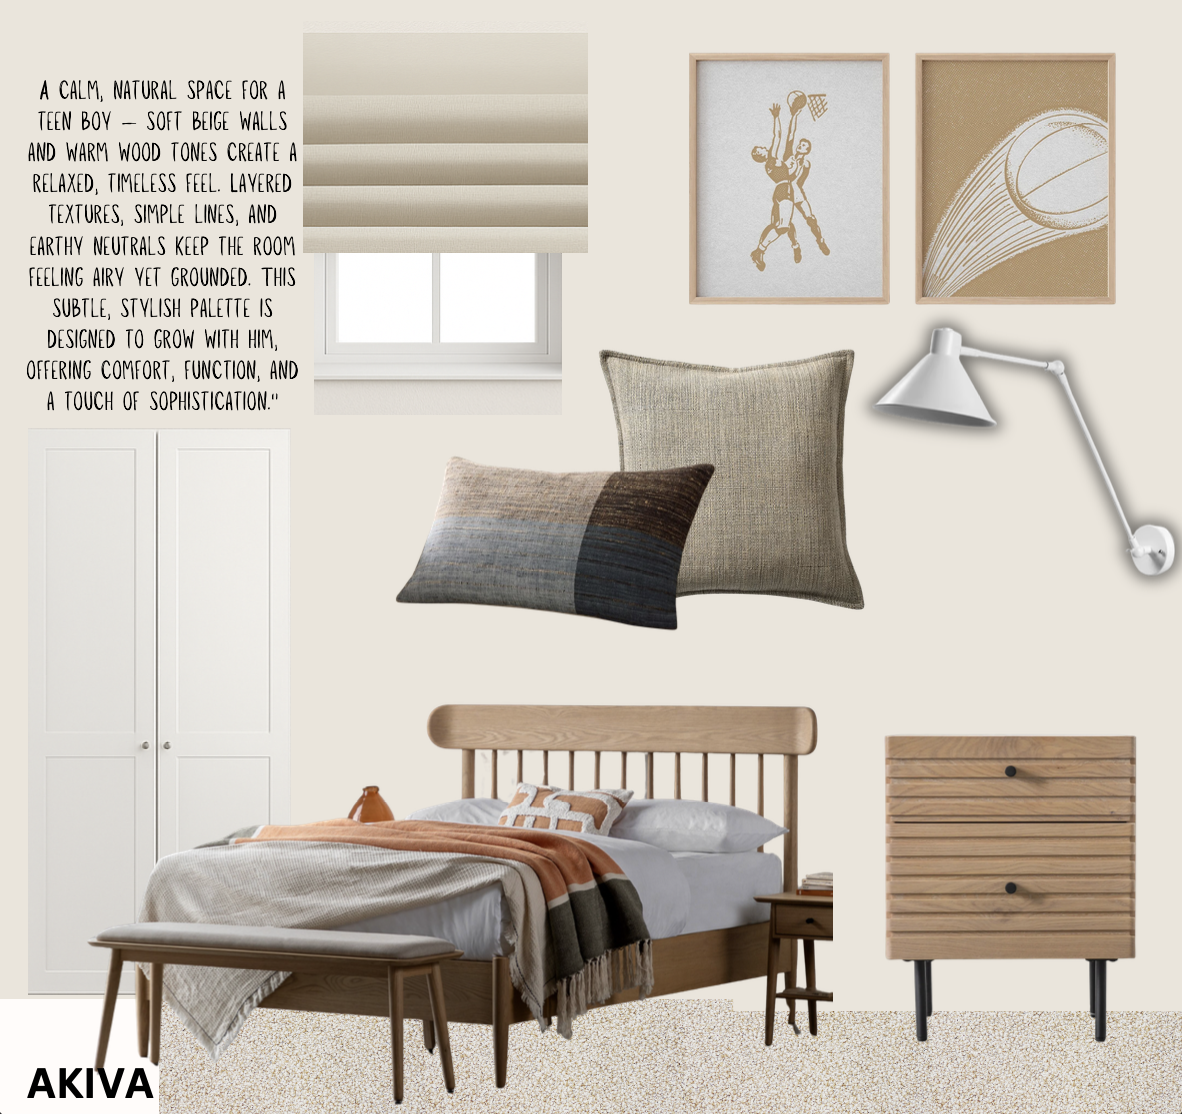
What a mood board actually does
A mood board makes decisions visible:
-
colour direction (warm/cool, light/dark, contrast level)
-
texture strategy (linen, oak, boucle, stone, metal)
-
style language (contemporary, classic, modern heritage, Scandinavian, etc.)
-
the “feel” of the space (calm, cosy, crisp, dramatic)
What you might receive
-
Mood board(s) (one per room or overall)
-
Colour palette
-
Material palette (wood tones, metals, stone)
-
Early suggestible furniture/lighting direction
Decisions you’ll make here
-
Do you want light and airy, or rich and cosy?
-
Are you open to colour, or mostly neutral?
-
How “timeless” vs “trend-led” do you want it?
Image suggestions (best conversion visuals):
-
Example mood board layout
-
Close-ups of textures/materials
-
Palette graphic with paint chips/fabric swatches
Stage 4: Space Planning & Furniture Layout
Goal: Make the space function brilliantly before you choose everything.
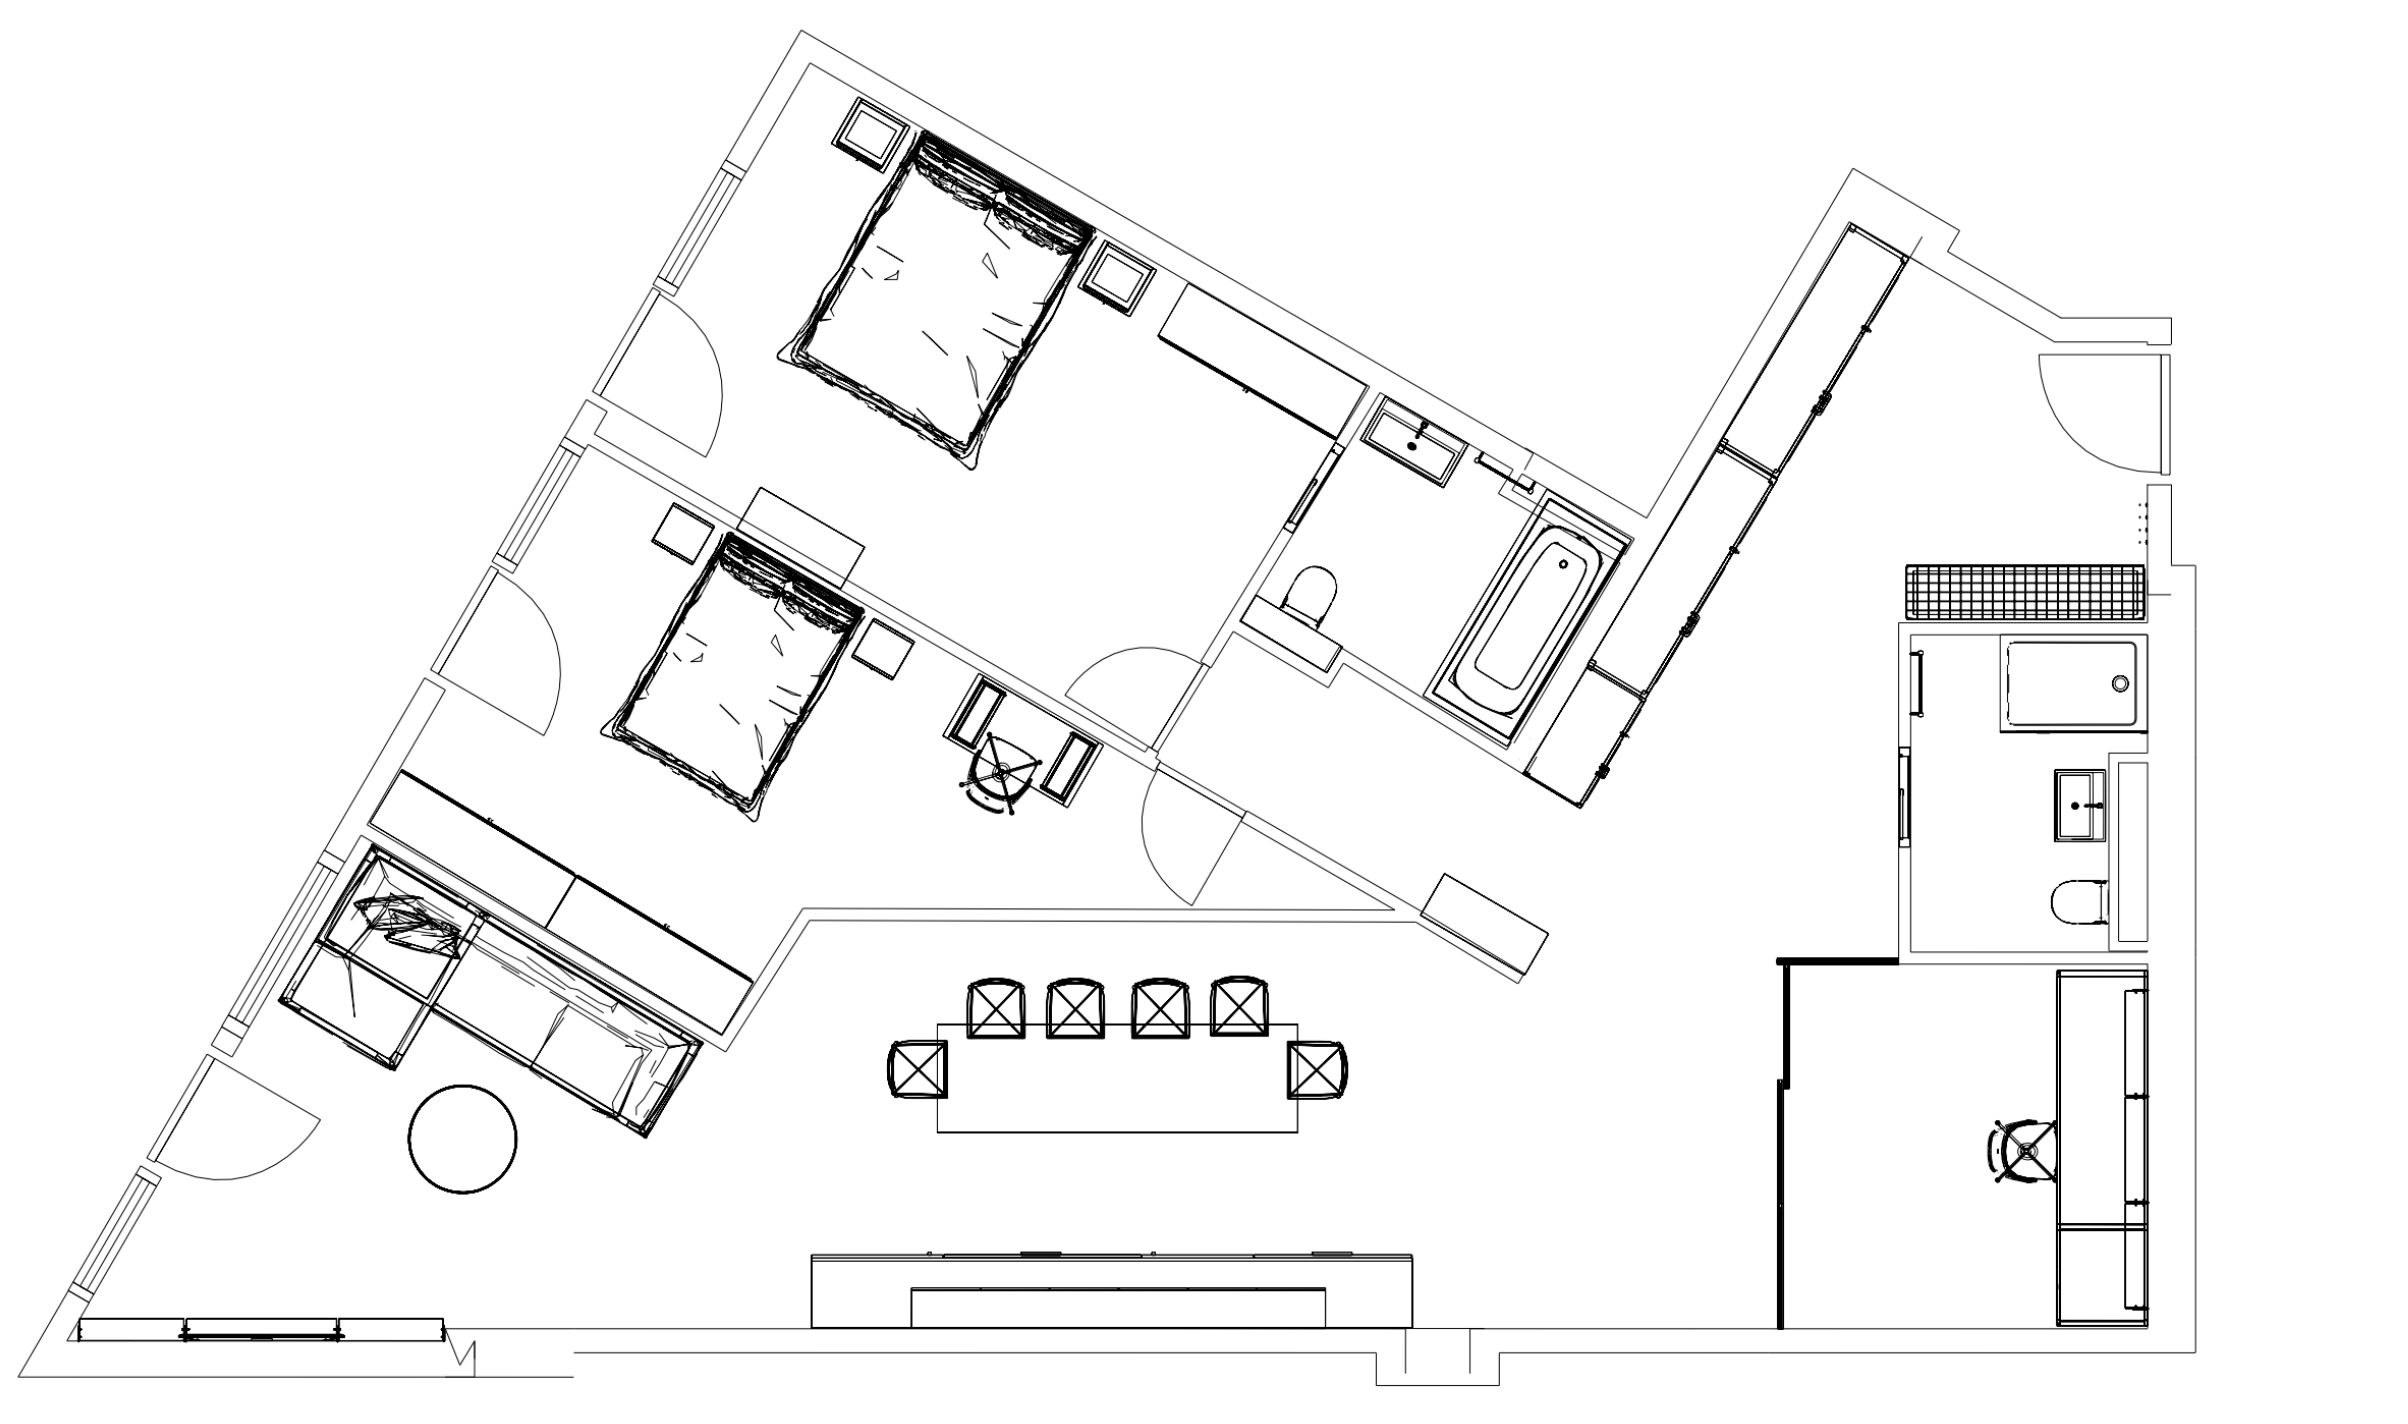
Space planning is where a designer earns their fee. It’s not just “where the sofa goes” — it’s circulation, proportions, sightlines, storage, and how the room supports your day.
What’s included
-
Furniture layouts with real dimensions
-
Clearance checks (walkways, door swings)
-
Zoning (especially open-plan)
-
Storage planning and “drop zones” (keys, bags, coats)
-
Optional: multiple layout options (Plan A / Plan B)
Key terms explained
-
Circulation: the paths people walk through the room
-
Clearances: minimum spaces around furniture (so it feels easy to live in)
-
Zoning: defining areas (lounge zone, dining zone, work zone)
Common UK pain points designers solve here
-
squeezed dining tables in open plan kitchens
-
bulky sofas in narrow terraces
-
“dead space” corners and awkward alcoves
-
TV placement that ruins the room
✅ Homeowner checklist (before approving a layout):
-
Does it work for daily routines (school mornings, guests, lounging)?
-
Where does clutter naturally land — and have we planned for that?
-
Will it still work if you add a rug, coffee table, or armchair later?
Image suggestion: a side-by-side of two layout options + a “furniture clearance” diagram.
Stage 5: Lighting Design
Goal: Make the home feel good at every time of day (and avoid the “one big light” problem).
Lighting is one of the biggest reasons rooms feel expensive vs flat — even with the same furniture.
What good lighting design includes
-
Ambient lighting: overall light (down lights, central pendants)
-
Task lighting: functional light (kitchen worktops, reading lamps)
-
Accent lighting: atmosphere and depth (wall lights, picture lights, LED)
Deliverables you might receive
-
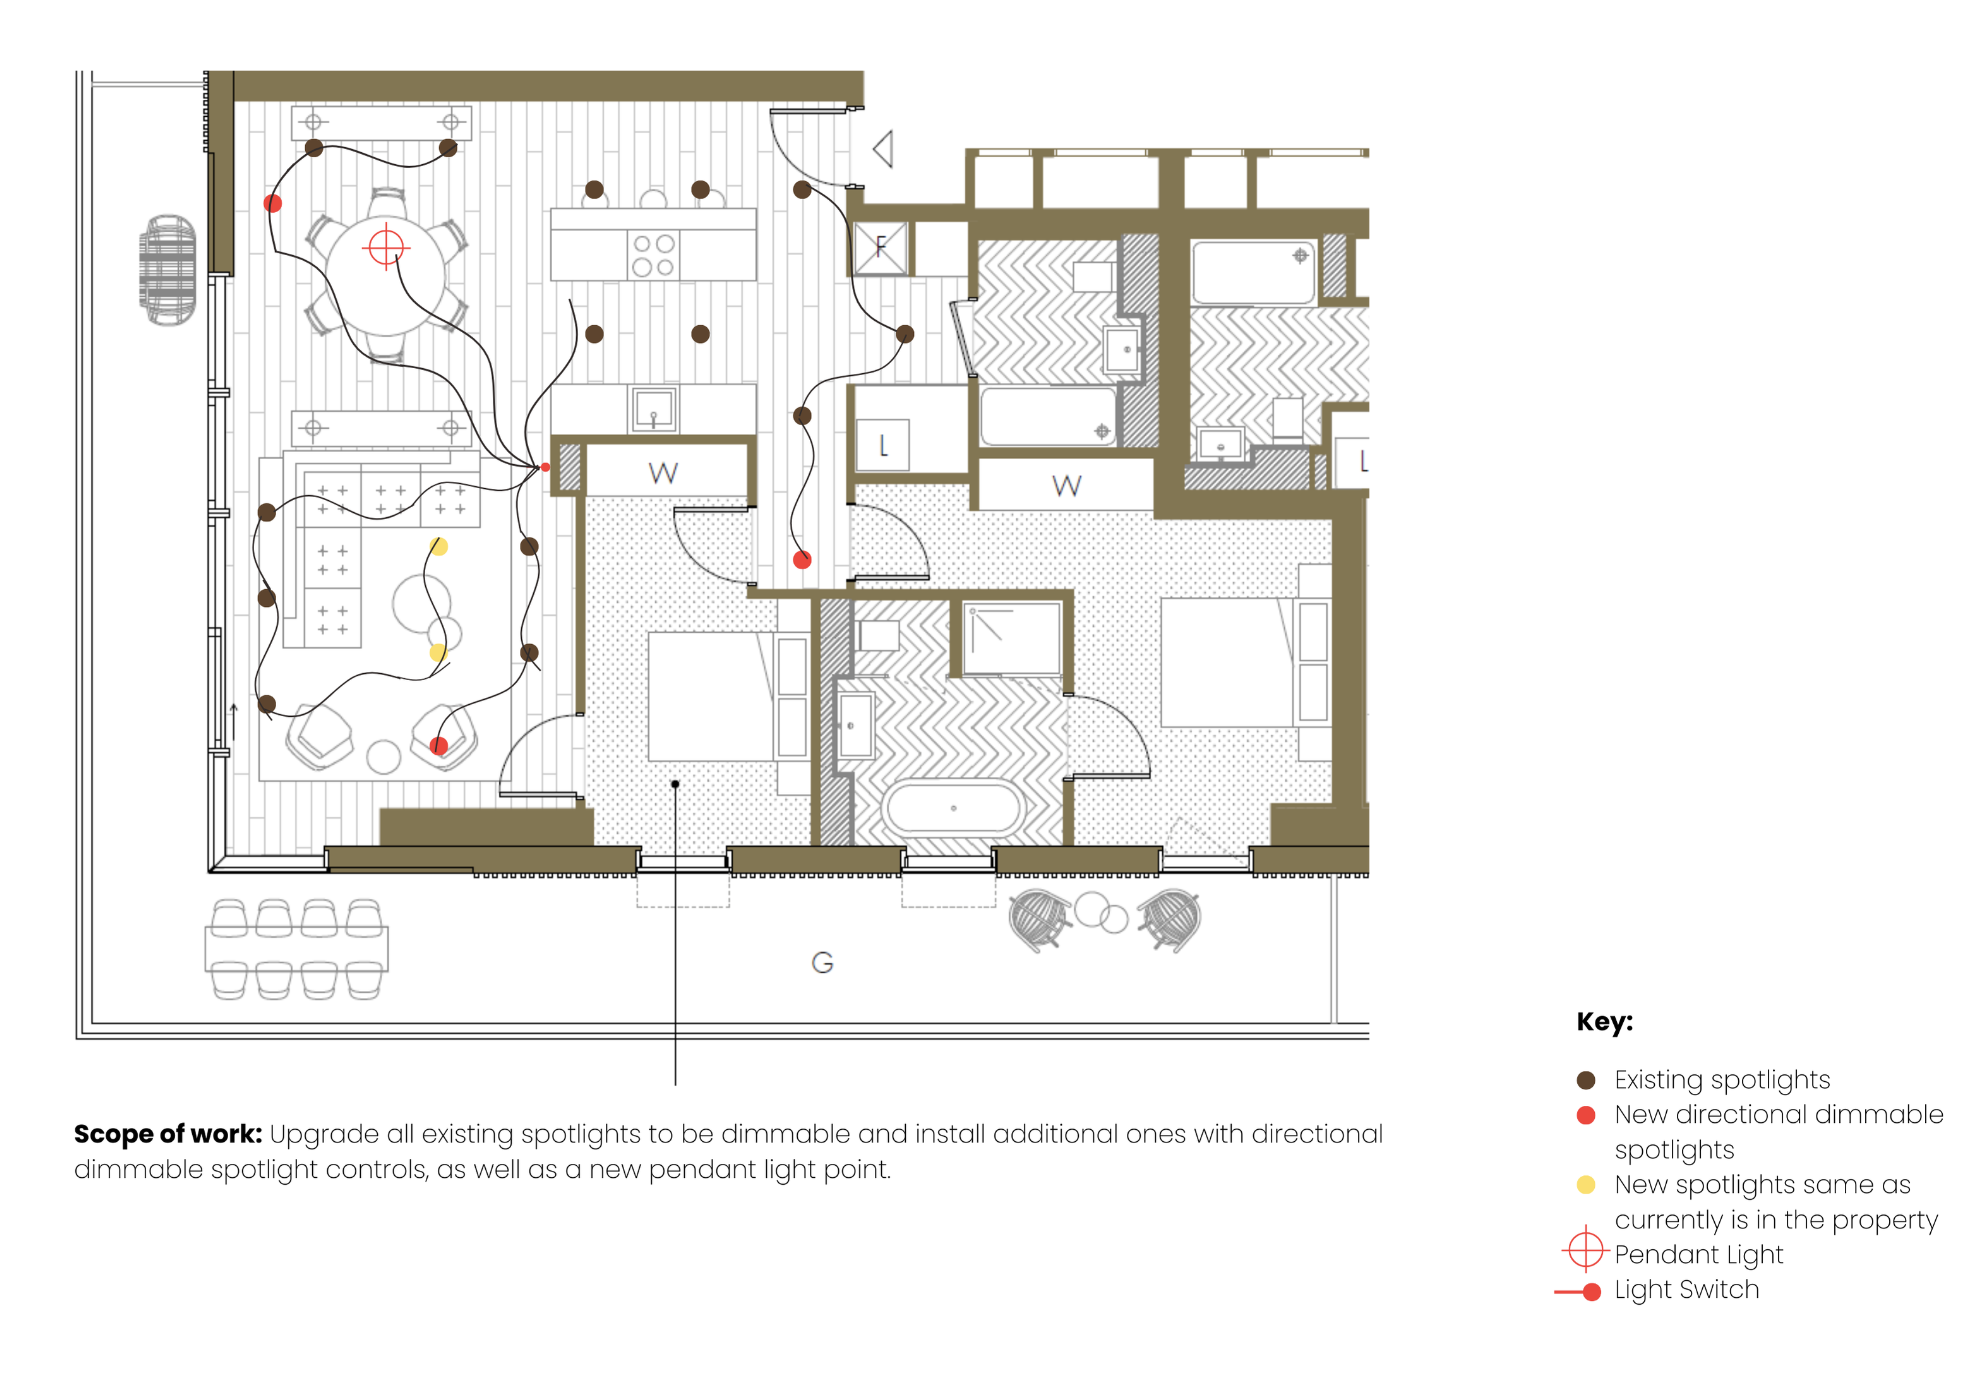
Lighting plan (locations, types)
-
Switching plan (what controls what)
-
Fixture recommendations and wattage/colour temperature guidance
Why it saves money
-
Avoids last-minute electrician changes
-
Prevents under-lighting (then buying lots of lamps to compensate)
-
Stops glare, awkward shadows, and “clinical” light
Stage 6: Design Development (Finishes, Joinery, Kitchens/Baths)
Goal: Lock in the design decisions so trades can price and build accurately.
This stage becomes more technical if you’re renovating.
What this includes
-
kitchen and bathroom layouts
-
tile choices and patterns (with edge trims/grout tones)
-
flooring selection and transitions
-
paint schedules by room
-
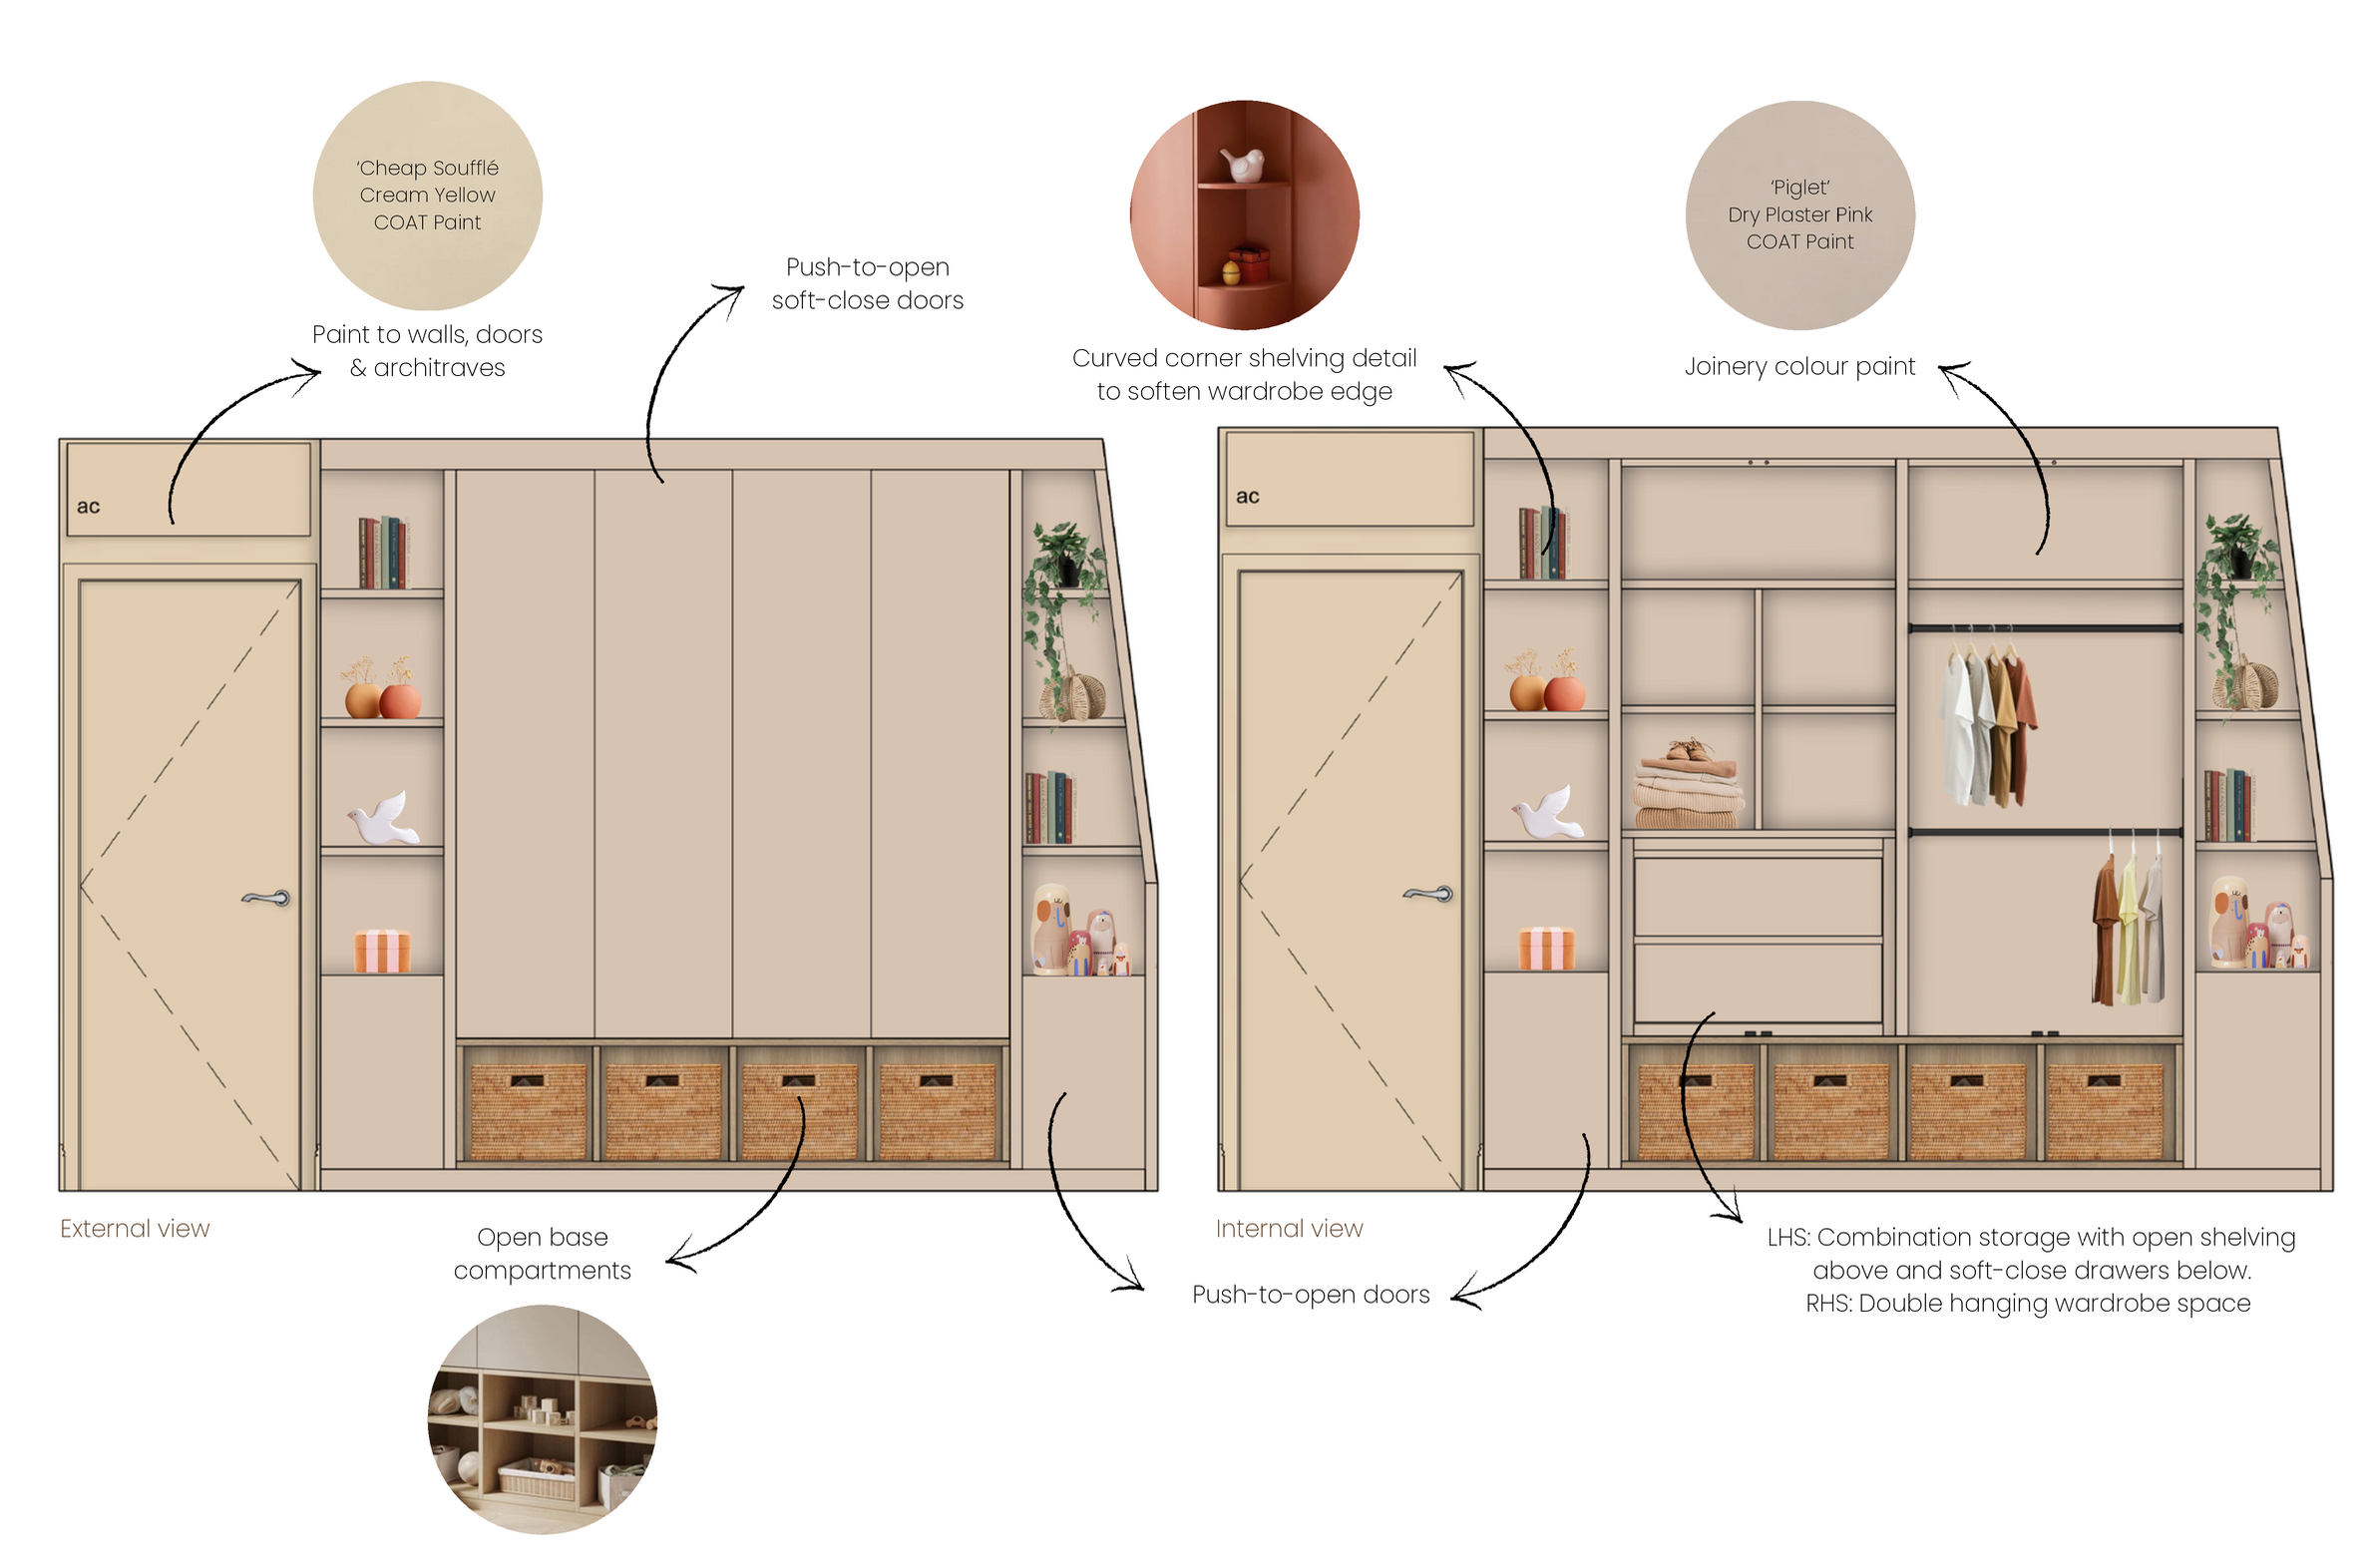
bespoke joinery design (wardrobes, alcove units, media walls)
Key term: “Specification”
A spec is the exact product/finish: brand, colour, size, finish, and where it goes. This is how you avoid “close enough” substitutions on site.
Stage 7: Technical Drawings (Plans, Elevations, Details)
Goal: Make the design buildable and reduce mistakes on site.
This is the stage many homeowners don’t know exists — but it’s often what separates a smooth renovation from a stressful one.
What are elevations?
Elevations are straight-on drawings of walls showing heights and placements:
-
where shelves go
-
how high cabinets sit
-
lighting positions
-
tile heights and alignment
-
vanity, mirror, and tap placement
What you might get
-
Floor plans (demolition/new layout)
-
Elevations (kitchens, bathrooms, joinery)
-
Sections/details (how something is constructed)
-
FF&E schedule (furniture, fixtures & equipment list)
Why homeowners love this stage (once they see it)
Because it removes ambiguity. Builders can quote accurately, and you’re less likely to get the dreaded: “We assumed…”
Stage 8: Procurement & Sourcing
Goal: Order the right items in the right sequence, within budget.
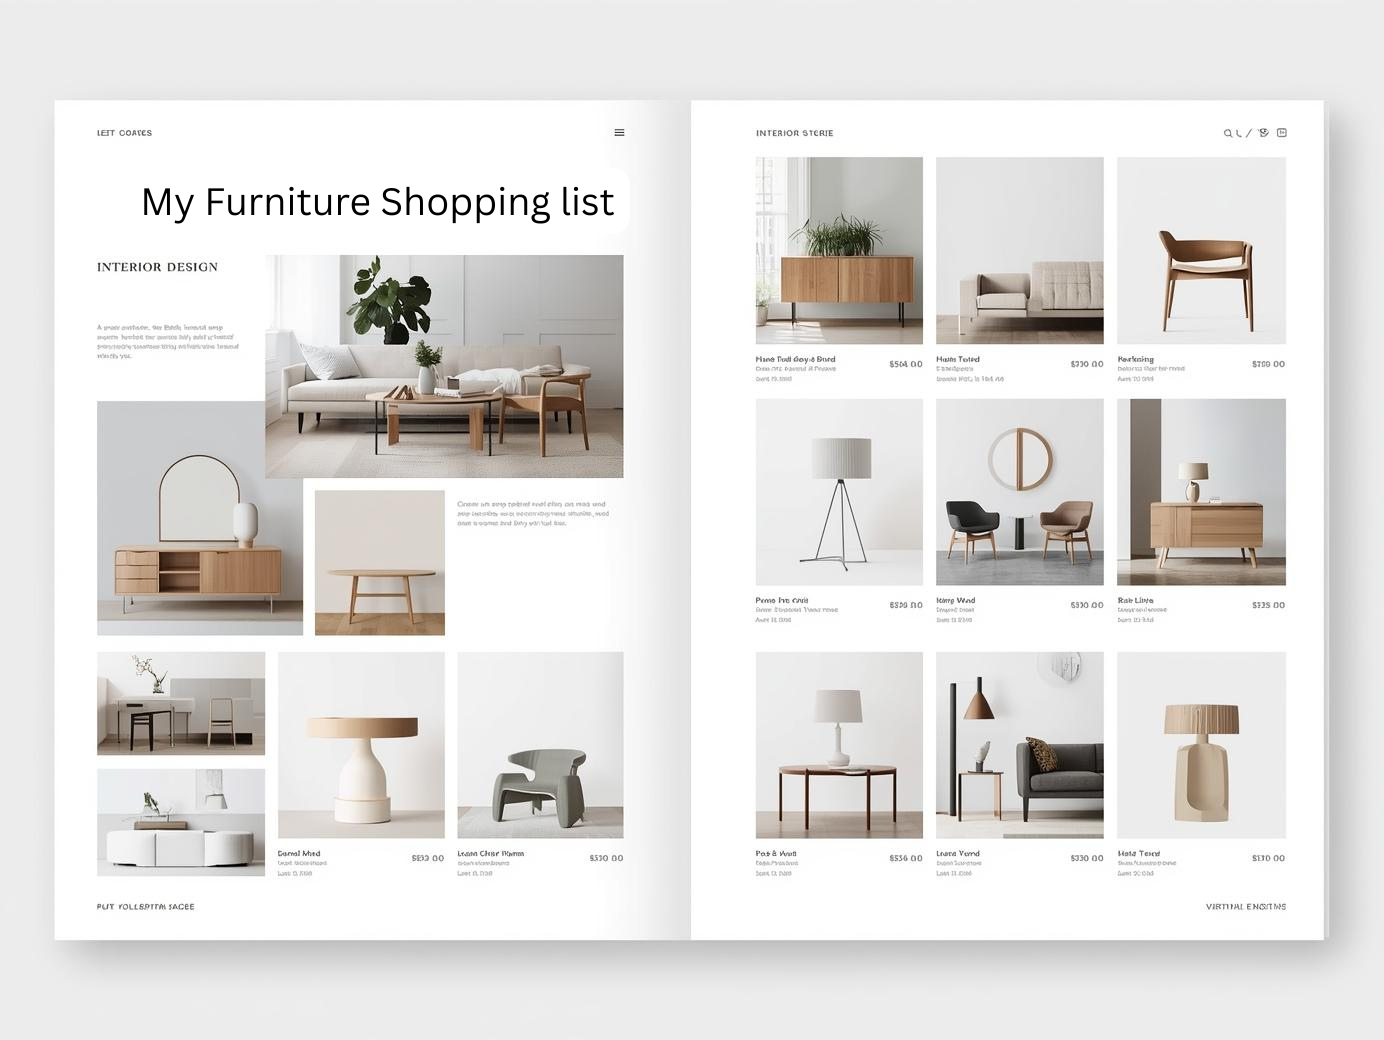
This stage can be as light-touch (shopping list) or full-service (ordering and tracking) as you want.
What this may include
-
product selections and alternatives (if stock issues happen)
-
lead times (sofas, bespoke joinery, tiles)
-
basket-building by budget (good / better / best)
-
sometimes: trade discounts (varies by studio and supplier)
Budget control tip
This is where fixed-price packages are great, they reduce decision fatigue and keep the process transparent. For homeowners nervous about spiralling costs, “known deliverables for a known fee” is powerful.
Stage 9: Implementation Support (Build Phase / Styling / Final Set-Up)
Goal: Ensure the real-world result matches the design.
Depending on scope, this may include:
-
answering builder questions
-
site visits (if included)
-
snagging (checking finish quality)
-
styling: cushions, art placement, accessories
-
final layout tweaks once furniture arrives
Key term: “Snagging”
A snag is a defect or issue to fix before sign-off (paint touch-ups, uneven doors, misaligned fittings).
How to Work With an Interior Designer: Hourly → Fixed-Price → Full Renovation
This is important for first-timers:
-
Hourly interior design consultation (UK): best for layout help, colour decisions, quick problem-solving
-
Fixed-price room makeover: best for one-room transformations with clarity and budget control
-
Full home renovation design: best for structural changes, kitchens/baths, multiple trades and drawings
At Studio Akiva, we offer flexible ways to get support — from targeted advice to full design packages. Learn more at https://www.studioakiva.com
Which Stage of the Interior Design Process Are You In?
If you’re not sure what kind of help you actually need, you’re not alone. Most homeowners don’t arrive knowing whether they need a full interior design service or just expert guidance at the right moment.
Use the quick self-check below to identify where you are — and what type of support will give you the most value.
🟢 Stage 1: “I know something isn’t working, but I don’t know where to start”
You might be feeling:
-
Unsure how to improve your layout
-
Overwhelmed by choices
-
Nervous about making expensive mistakes
-
Stuck between DIY and hiring a professional
Best fit for you:
✔ Hourly interior design consultation
✔ One-off layout, colour, or space-planning advice
This is ideal if you want clarity and confidence before committing to bigger decisions.
🟡 Stage 2: “I want to redesign a room, but I need a clear plan”
You likely:
-
Want one room to feel finished and cohesive
-
Need help with layout, furniture, lighting, and finishes
-
Want budget control and no surprises
-
Don’t want to manage everything yourself
Best fit for you:
✔ Fixed-price room makeover package
This gives you structure, professional guidance, and a clear roadmap — without the commitment of a full renovation service.
🔵 Stage 3: “We’re renovating or reworking multiple spaces”
You may be:
-
Renovating a house or flat
-
Reworking layouts, kitchens, bathrooms, or joinery
-
Coordinating builders and trades
-
Needing technical drawings and specifications
Best fit for you:
✔ Full interior design service
✔ Space planning, lighting design, technical drawings & specifications
This level of support reduces risk, protects your budget, and ensures everything works together — from layout to final styling.
Still Not Sure?
That’s exactly what a discovery call is for.
At Studio Akiva, we help UK homeowners figure out what level of support makes sense for them — whether that’s a few strategic hours or a complete design journey.
Ready to Take the Next Step?
Book a free discovery call about your project →